
Installing Marlin 2.0 with the Arduino IDE
It would seem that installing Marlin 2.0 on an Ender 3 3D printer is suppose to be done using PlatformIO within Microsoft VS Code. Even though not recommended, it can be done using the Arduino IDE. It does require a little Set up and preparation first.
Some time ago, I did a write up on how to update the Ender 3’s firmware with the TH3D Unified Marlin Firmware using Linux and the Arduino IDE.
This process is actually a bit simpler. But it does assume you’ve flashed the firmware with the Arduino Bootloader. If not, that will have to be done first. That process would be the same no mater which firmware version you are using.
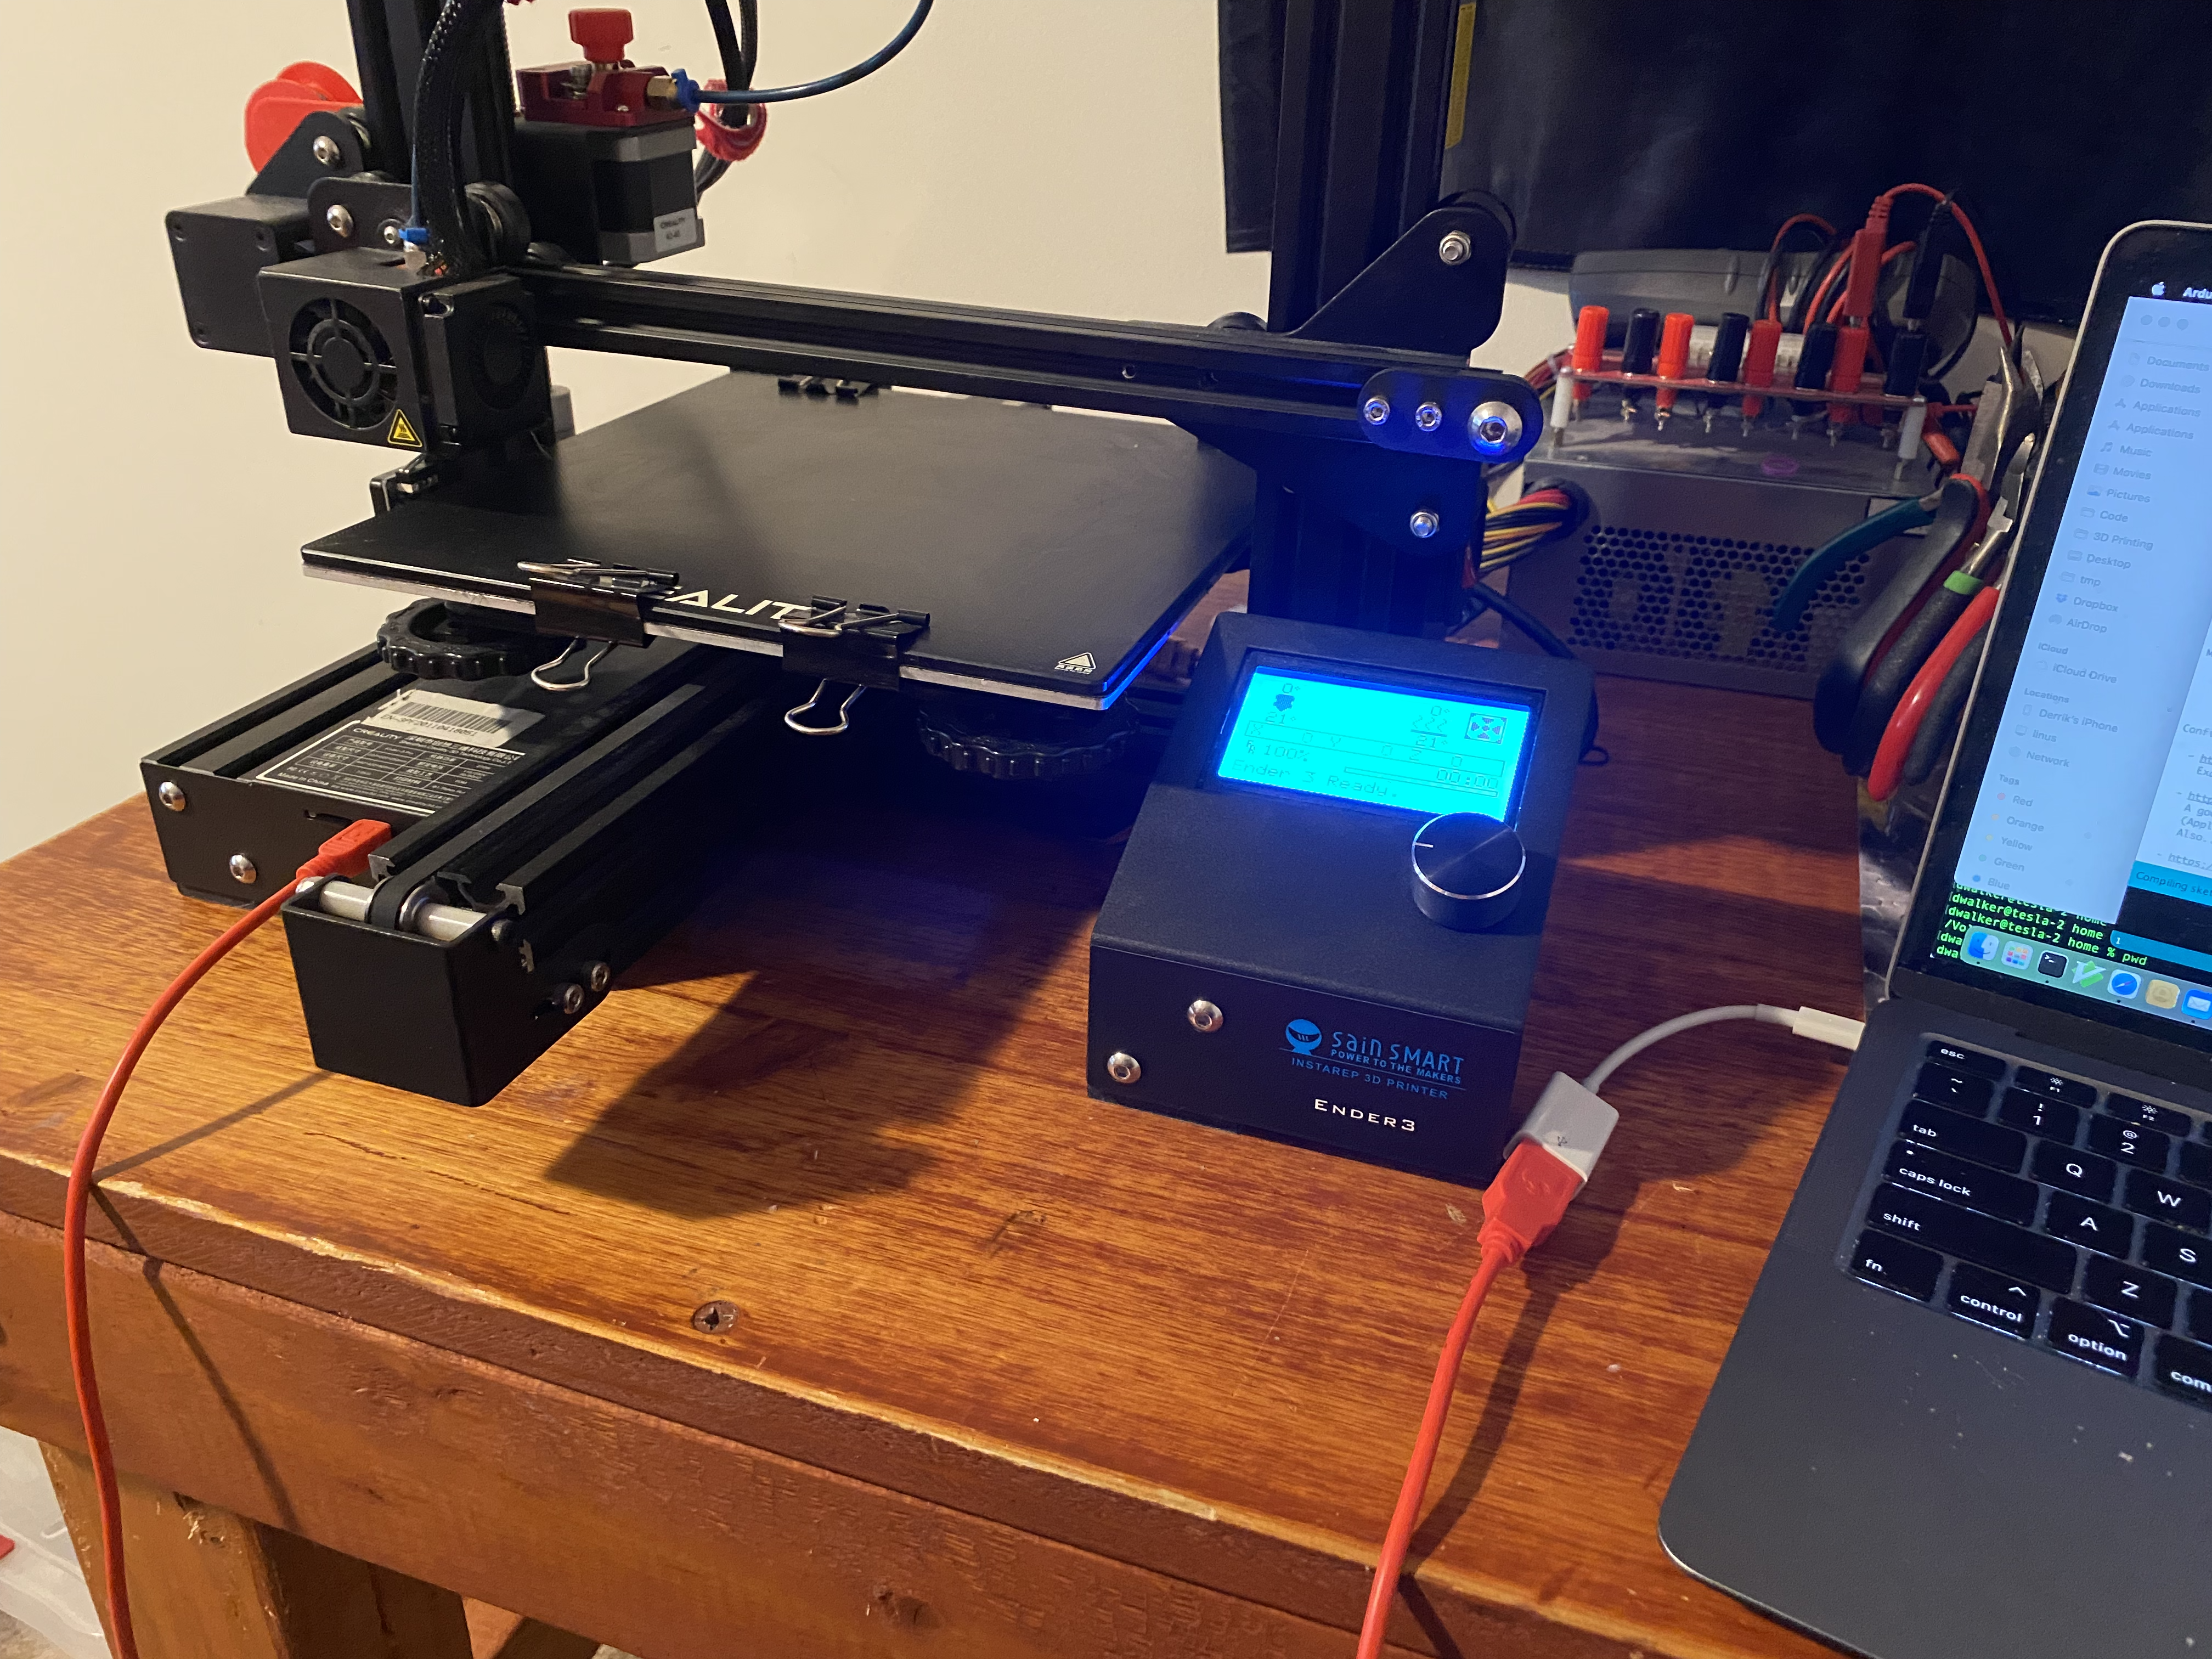
For these instructions, I used an Ender 3 Pro with the V1 board that has an ATmega 1284P 8-bit board. I also did this on a MacBook, but as long as the Arduino IDE is set up and working, it should be the same for Linux or even Windows.
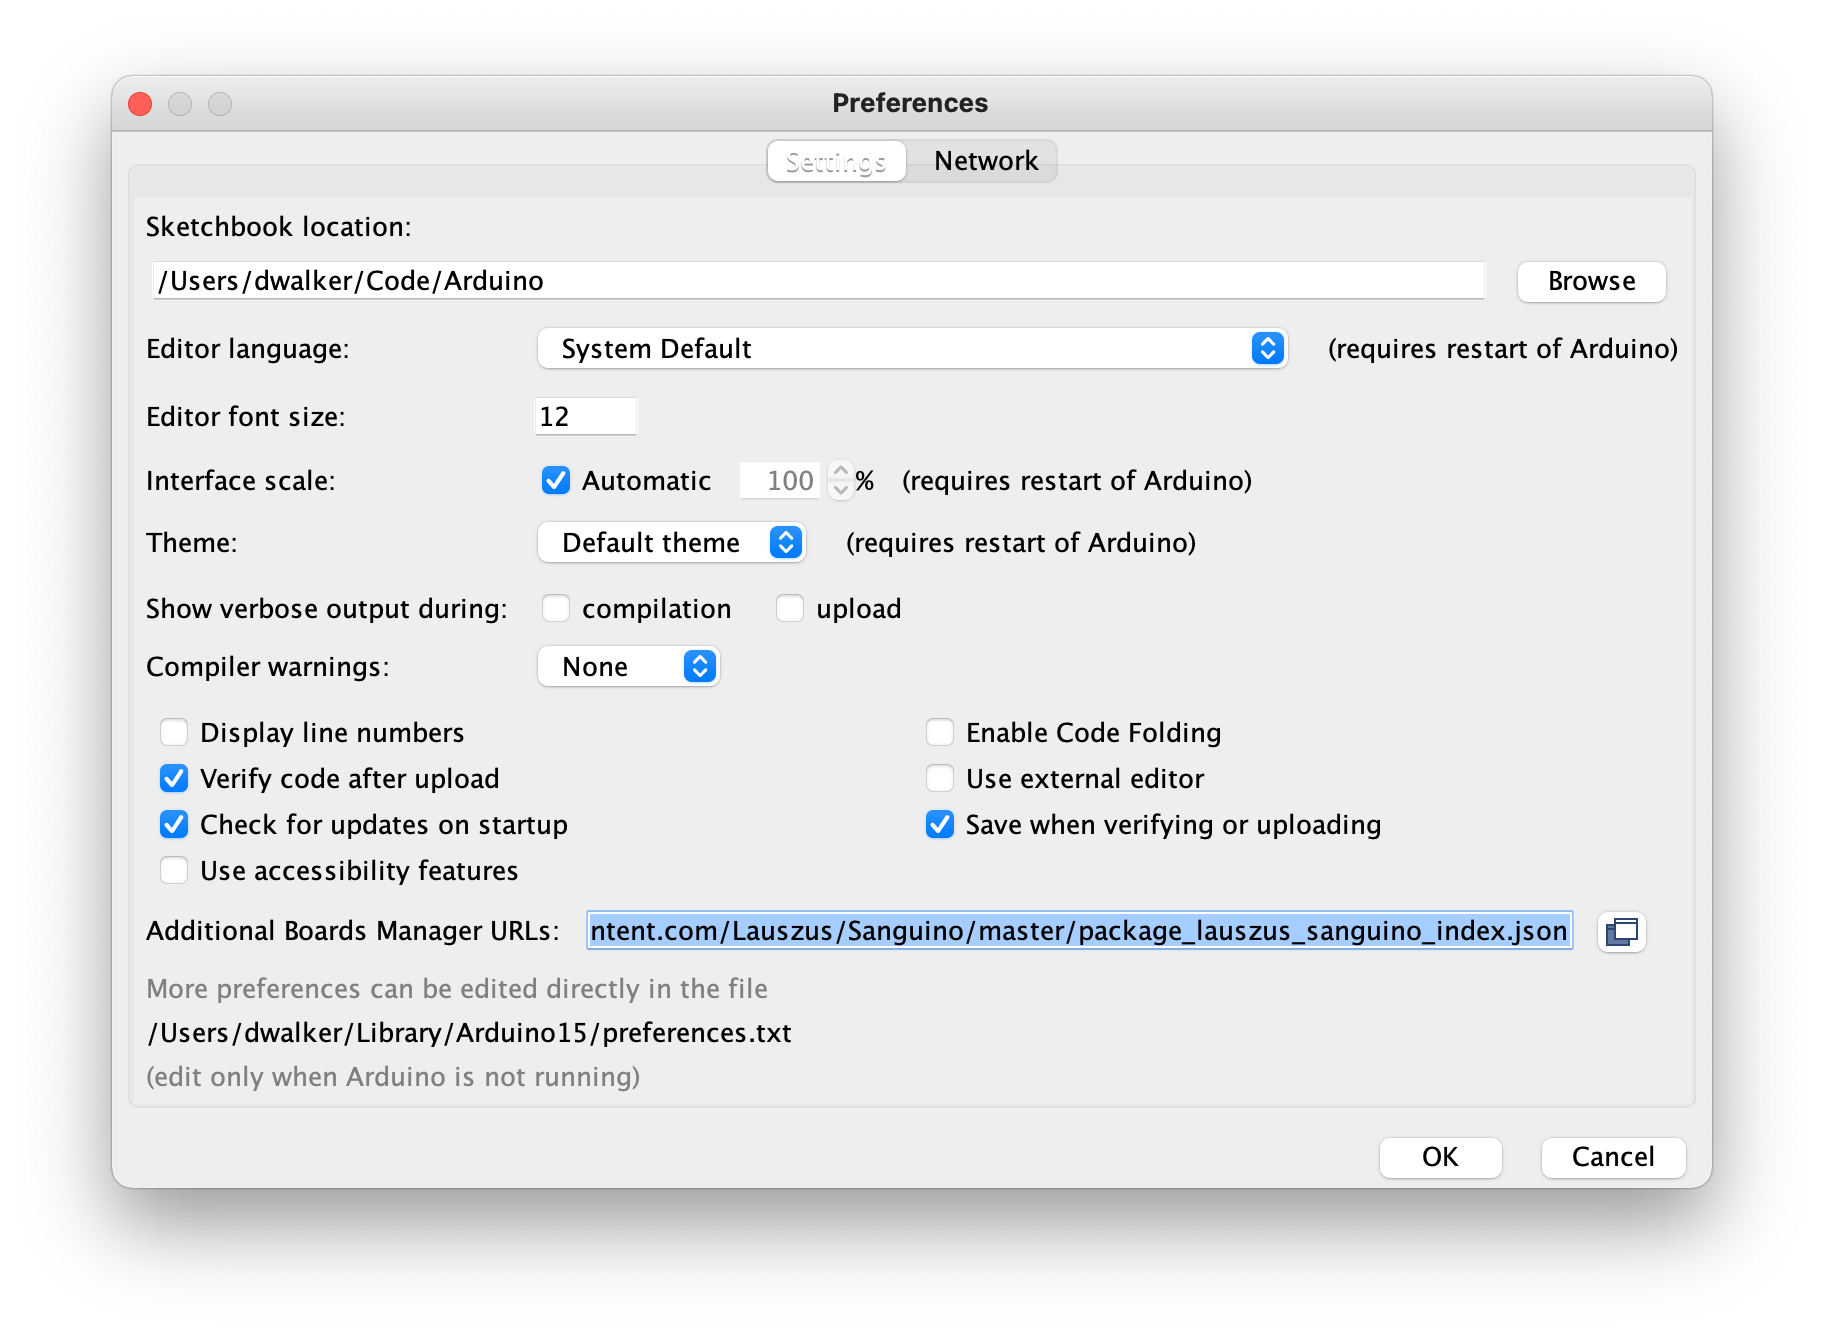
First, the Sanguino has to be added to the Arduino IDE. In the preferences window, under Additional Boards Manager URLs, add this URL:
https://raw.githubusercontent.com/Lauszus/Sanguino/master/package_lauszus_sanguino_index.json
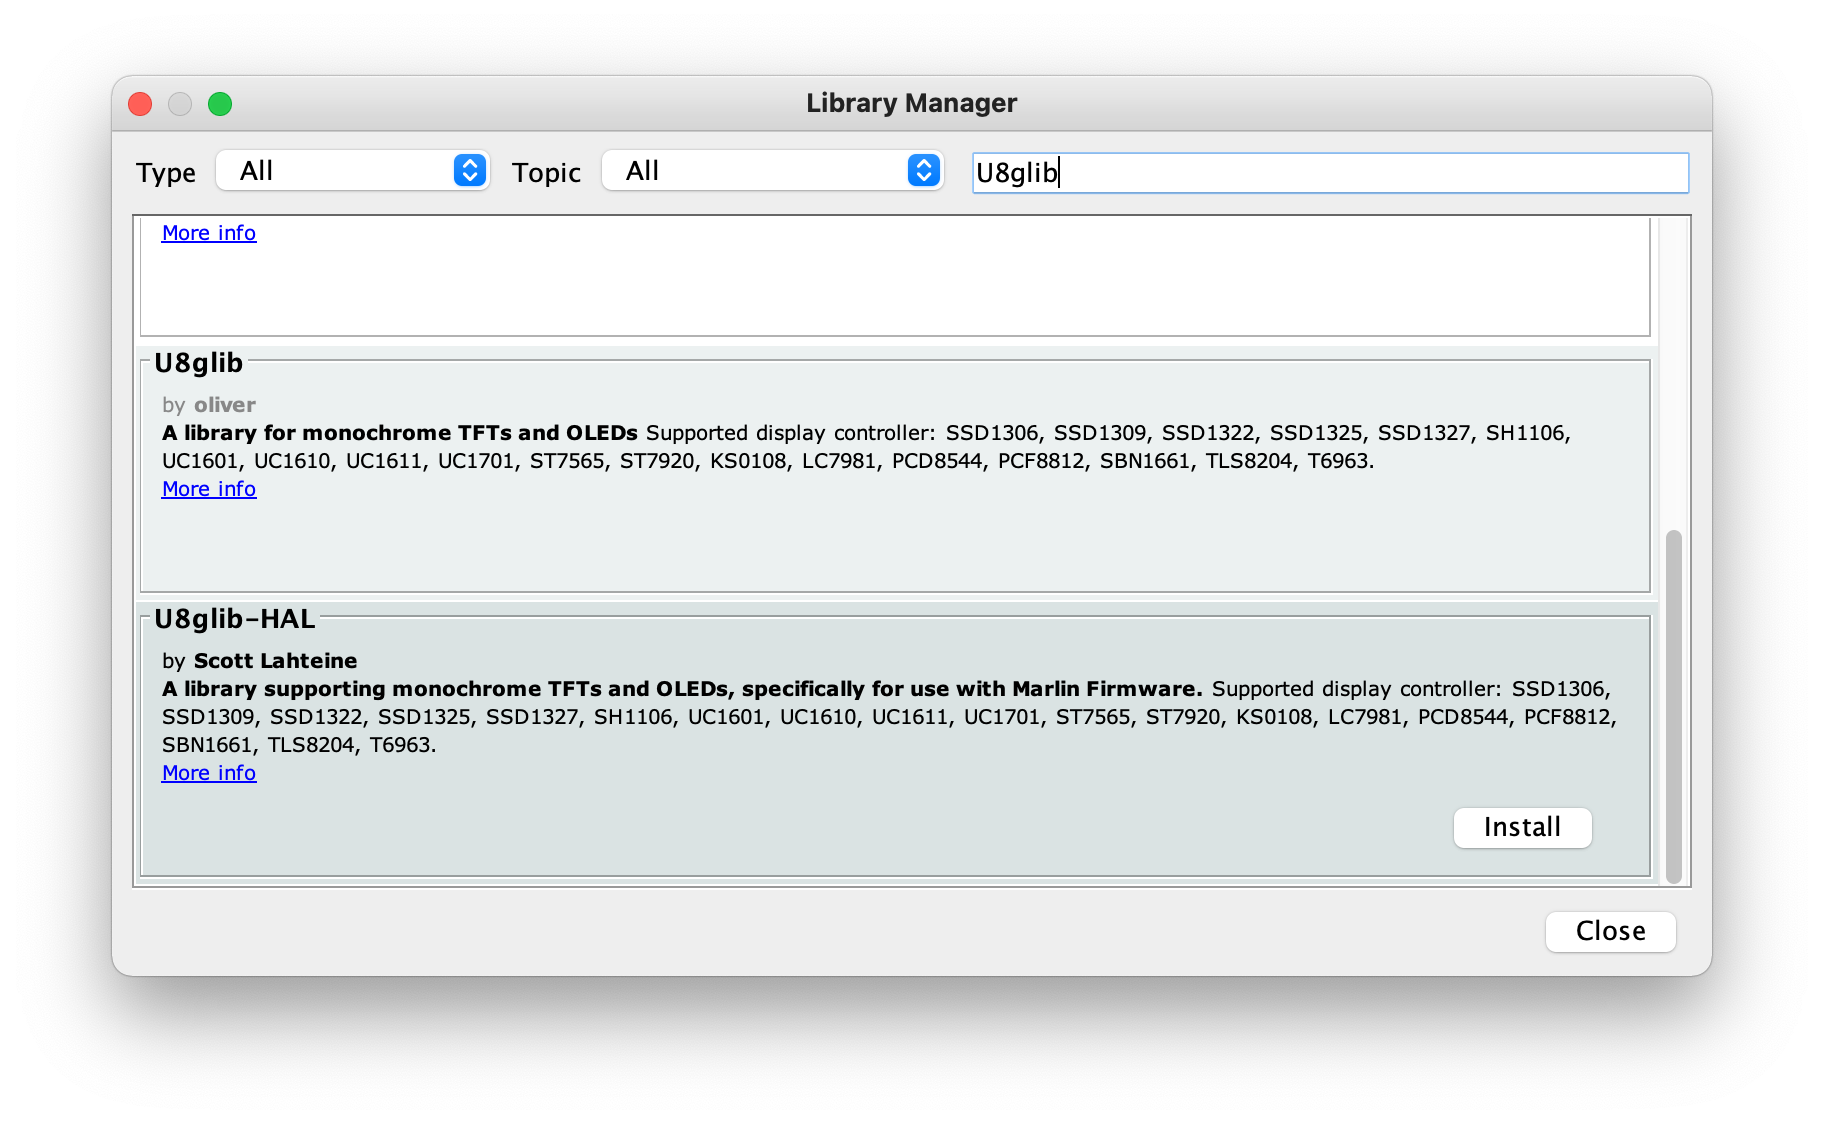
Next, in the Arduino’s Library Manger, install U8lib-HAL
If you still need to FLASH the Arduino boot loader on the Ender, now is the perfect time to do so. You can find the instructions in my previous blog post referenced above.
Now download the Marlin software from git. You’ll need to clone two repos
git clone https://github.com/MarlinFirmware/Marlin
git clone https://github.com/MarlinFirmware/Configurations
Collect the files needed. I use a directory called Code in my home directory to keep my all code I work on.
cp Marlin/Marlin ~/Code
cp Configurations/config/examples/Creality/Ender-3\\ Pro/CrealityV1/\* ~/Code/Marlin
Open the Marlin.ino file in ~/Code/Marlin in the Arduino IDE.
Set the board and processor type:
Under Board, selected Saguino-avr -> Saguino Under Processor select “ATmega1284 or ATmega1284P (16 MHz)”
Switch off and unplug the Ender from the mains power, and plug in your computer to the USB port on the front.
This is important: Before continuing any further, make sure the power to the printer is turned off and the mains power plug is disconnected from the printer. It will be powered by the USB port on your computer, and if it were to be switched on while connected, it could damage both USB ports and your computer.
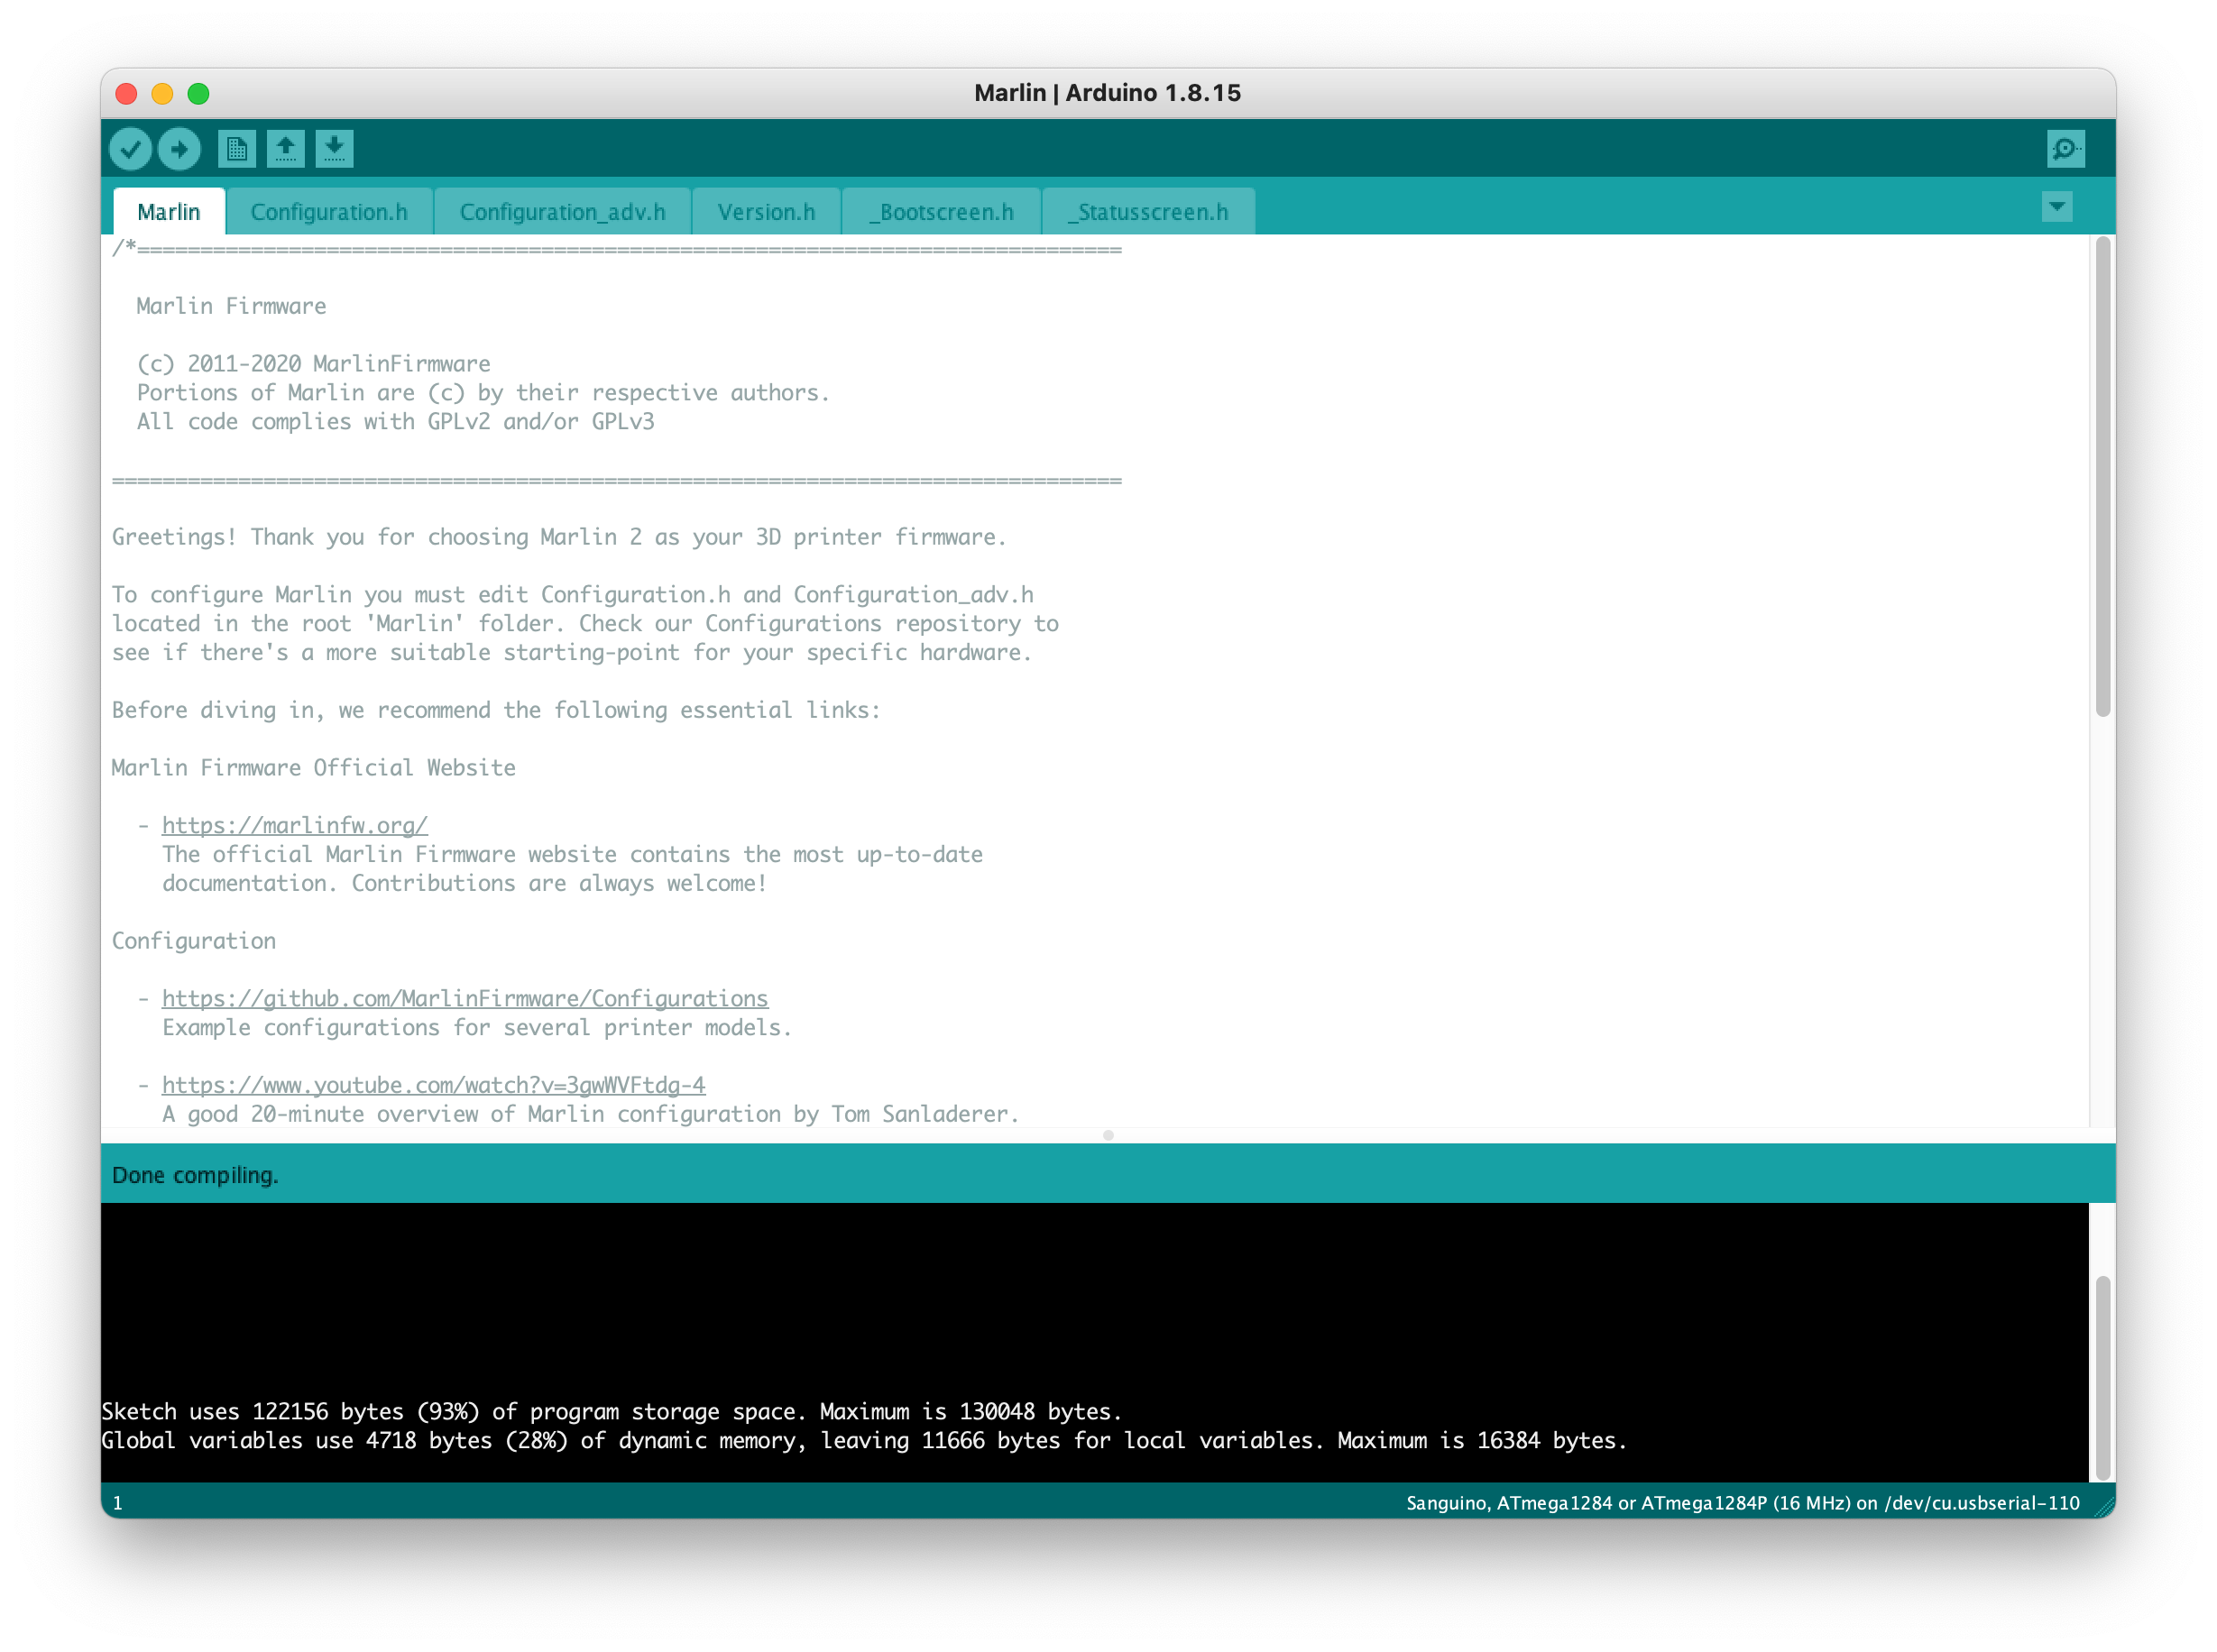
Click compile ( the √ ) to make sure it compiles. Once it compiles cleanly, it can be uploaded by pressing the arrow ( the → ). After uploading, it will reboot and you'll get a message to initialize the EEPROM. Say yes. You will have to reset and changes you had saved.
Once completed, disconnect your computer, plug it back in, turn it on and run a test print. Your printer now has the latest Marlin firmware! And it was done without any Microsoft software!